About Translation
After a Guide was recorded and language management best practices were followed, you can start translating your Guide content.
The guide can be translated either:
- within Userlane
- outside Userlane via export and import (XLSX or CSV) to work offline on it anytime, and import it when ready.
ℹ️ Important
Before continuing, ensure the languages are available in Userlane by adding them from the Portal. For more information on language management, check the following article.
Translate Guides within Userlane
Within Userlane, you can translate a Guide and its corresponding steps from the Portal or the Editor.
Translate Guides within the Userlane Editor
You can translate Guides from the Editor automatically or manually.
Automatic Guide translation
One option to translate your content is to use the auto-translate functionality. Some advantages include:
- Cost savings: Automating certain parts of your processes allows users to focus on tasks that bring more value to your organization.
- Increased efficiency: Translators will provide only minor changes by double-checking the translation before setting the Guide live.
- Improved User Experience: Providing content in users' native language enhances their experience, making it easier for them to understand and engage with the information.
- Enhanced Communication: Utilizing different languages allows you to effectively communicate with diverse user groups, including international customers, employees, or partners. It fosters better understanding and strengthens relationships.
⚠️ Auto translation also has limitations and potential drawbacks, so we recommend all translations be double-checked before setting them live.
ℹ️ To have the auto-translation button enabled in the Editor, ensure that your latest Guide changes are saved and that you use the right language key.
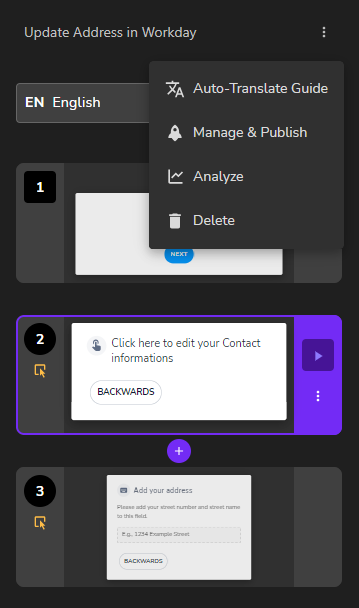
To translate a Guide, open the more-menu section and click on Auto-Translate Guide.
This feature helps you translate your Guide's text from the source language to the selected target languages.
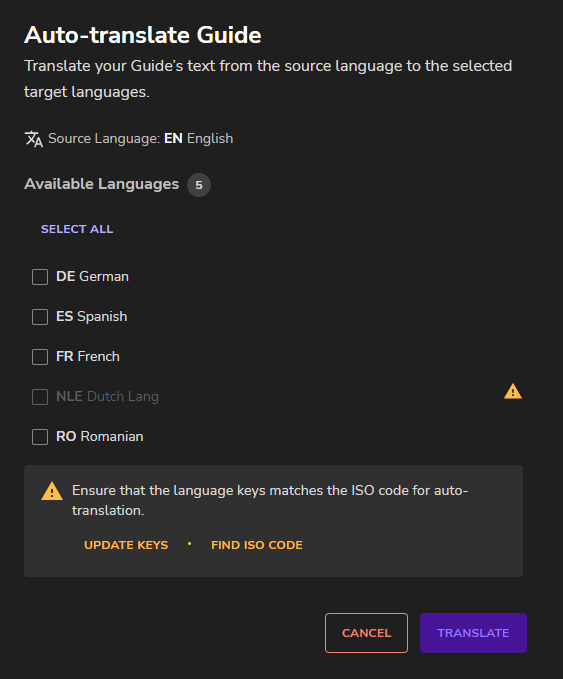
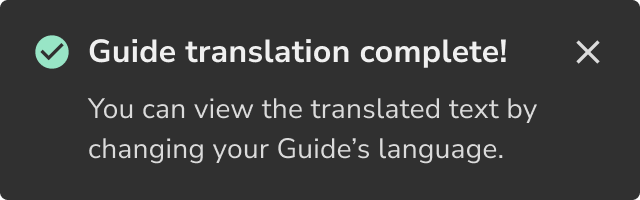
During the auto-translation process, you cannot edit the Guide's text - a notification will be displayed once the translation is finalized.
If you want to translate only steps, please open the step's more-menu section and click the auto-translate button.
ℹ️ The "auto-translate" feature relies on OpenAI API, a service provided by Microsoft. No Personal Identifiable Information (PII) or Sensitive Personal Information (SPI) is being processed when used. No prompts or completions are stored in the model during these operations, and prompts and completions are not used to train, retrain or improve the models.
For additional questions, please don't hesitate to contact our Customer Success Team.
Benchmark tests
Depending on the Guide's complexity and length, Userlane may need extra time to finalize the auto-translation process. When the process is started, it runs in the background for a couple of minutes until it is finalized.
| Case | Steps | Languages | Total time |
| 1 | 8 | 10 | 0:01:33 |
| 2 | 8 | 20 | 0:04:03 |
| 3 | 15 | 10 | 0:07:06 |
| 4 | 5 | 5 | 0:00:14 |
| 5 | 10 | 15 | 0:03:45 |
| 6 | 3 | 12 | 0:01:11 |
| 7 | 12 | 7 | 0:02:30 |
ℹ️ If a translation takes longer than 5 minutes, you will see a notification saying "Translation is taking longer than expected". In this case the job on Userlane side is still being done. There is no need to retry and you can come back later to see the final translation.
Manual Guide translation
To manually translate Guides in the Editor:
1. After you open the Editor, access the Guide you wish to translate.
2. Click on the Language dropdown and select the Language you wish to work on.
Translate Guides outside Userlane
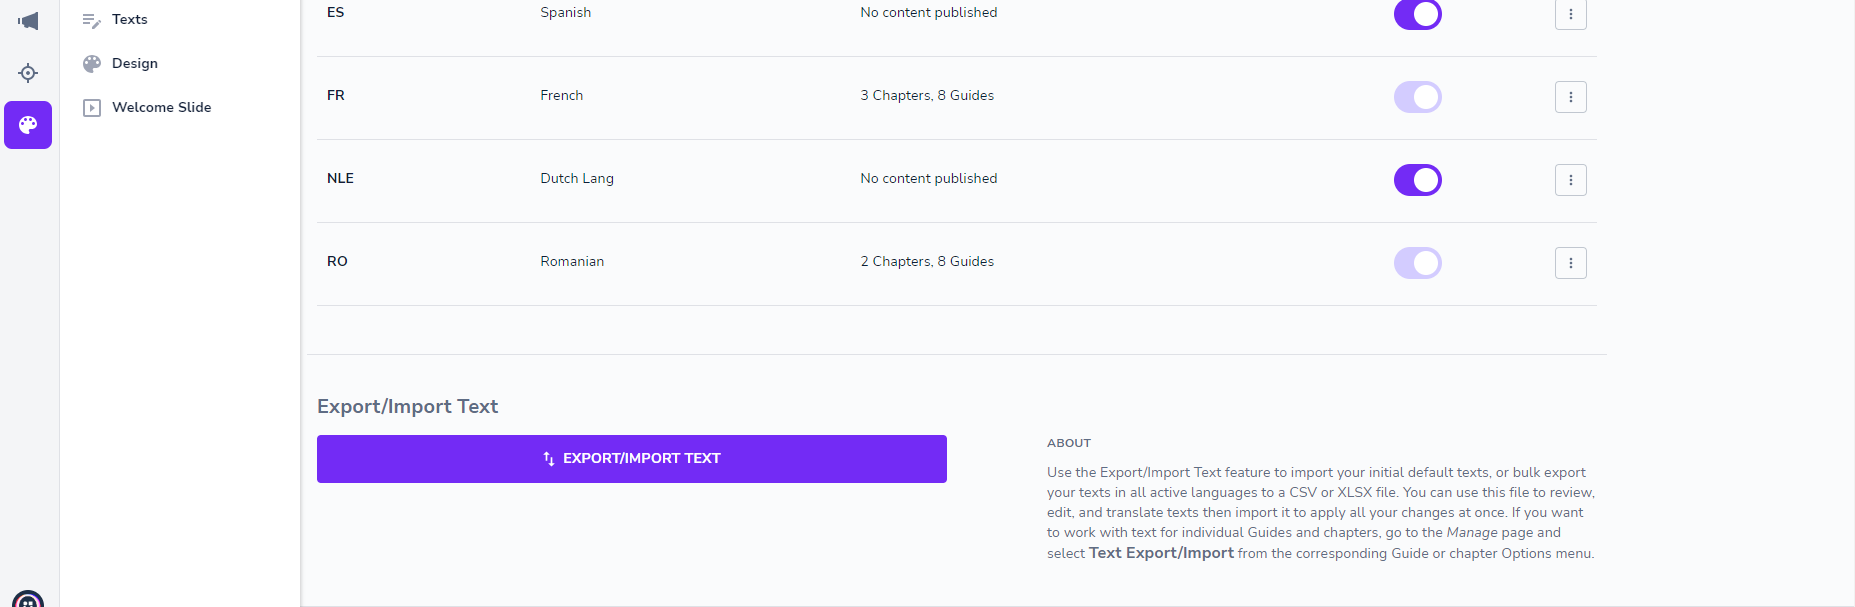
Use the Export/Import Text feature to import your initial default texts or bulk export your texts in all active languages to a CSV or XLSX file. You can use this file to review, edit, and translate texts, then import it to apply all your changes at once.
To access it, go to Customize > Languages and Texts > Export/Import
When you click Export/Import, a modal describing the export and import processes will pop up.
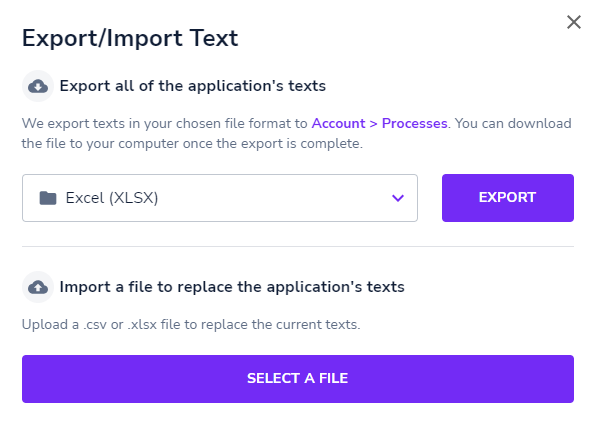
If you want to work with text for individual Guides and chapters, go to the Guides page and select Text Export/Import from the corresponding Guide or Chapter Options menu.
ℹ️ Important
- Any "<missing element>" placeholders in the exported text will be replaced with relevant info box content or localized links upon re-upload.
- Modifying the file (including the original language) will apply changes after importing, even to the original language. Delete other "language" columns to import languages in the exported Excel file.
- Identify each language using the language code in the first row (e.g., "en"). Do not delete or change the first 2 columns.
