This article covers
How it works
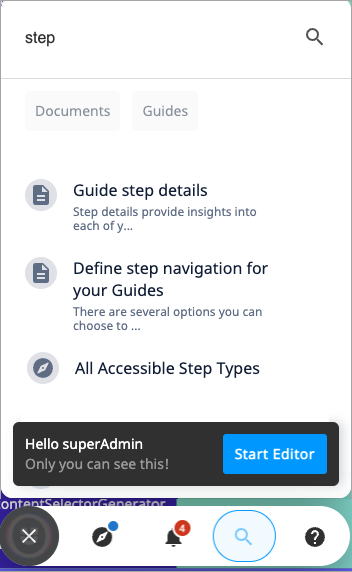
Once the integration is set up and enabled, your users can seamlessly access Confluence content through the Search feature in the Userlane Assistant. Different content types are identified by an icon to help you quickly identify the source, which include Guides, Announcements, and yes, Confluence pages!
Search results and ranking
Alongside your Userlane content, search queries are applied to Confluence page titles and content text, using partial or complete searches.
Ranking
Search results are prioritized in the following order:
Frequency of search term in title
Frequency of search term in body content
Most recent updated date and time
All content types are treated equally when determining their priority in search results.
Viewing results from Confluence
Search results are listed in the Assistant in the priority order described above. Your users can easily identify Confluence content by the document icon. If their results include more than one content type, they can select content filters to refine their results to specific types (Guides, Announcements, and documents). A maximum of 50 results is displayed.
To view content in an expanded preview window, users simply select a document result.
With the document view displayed, they can continue to use your application as normal, return to the search results view, or perform another search. If they want to keep the preview active while using the application, they can click the minimize icon in the top right of the preview window to pin it to their screen. Expand it again to continue from where they left.
💡 Good to know
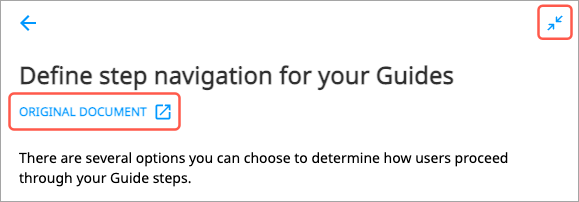
If the content is too long for easy scrolling, users can open the original document in a new browser tab by selecting the original document link under the page title. This action might require a Confluence login, for example, if the page does not have anonymous access permissions.
Setup
Prerequisites
API access to Confluence
Userlane Admin or Moderator role permissions
Permissions
It’s important to note that Confluence permissions for the integration are inherited from the Confluence user for which the API token is generated. If you want to ensure that the correct permissions apply, create a Confluence user specifically for the integration and set up the required permissions and restrictions before generating the API token.
Generate an API token
Generate the API token by following Atlassian’s step-by-step guide. If you haven’t already created a Confluence user for this purpose, do so before completing this step.
Enable the connection for your organization
Sign in to the Userlane Portal and go to Account > Global Settings > Integrations.
Select Confluence under Available Integrations.
Enter the following details:
Name (optional): You can change the default name assigned to the connection to help you identify it if you use more than one
The URL of your Confluence, e.g. https://ourcompanywiki.atlassian.net (the link should end with .net)
The email address of the Confluence user that you defined for the integration
The API token created for the Confluence user
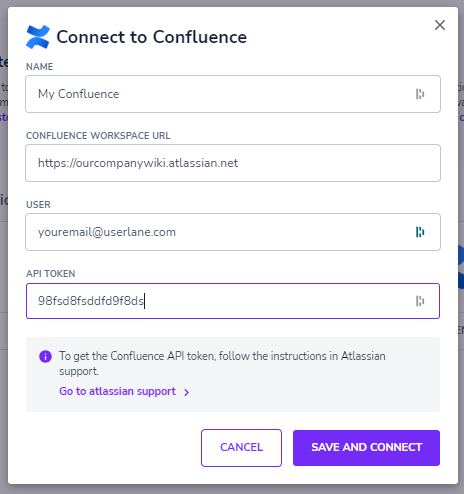
Select Save and Connect. Once the connection is created successfully, it appears under Connected Integrations on the Integrations page. You can later edit or remove a connection for maintenance purposes, or if it is no longer required.
Note: If the connection cannot be established, an error message displays with details of the issue, e.g. URL could not be found, or an API token that did not work.

Activate the integration for your applications
Before enabling this feature, remember to customize or translate the default texts that are provided for search filters and document preview. You can do this from the Portal by going to Customize > Texts, then select Search under Assistant.
To connect Search with Confluence:
Sign in to your Userlane Portal and go to Customize > Search.
Under Activate Search, ensure that the Display Search In The Assistant toggle is enabled.
Under Activate Knowledge Base Search, enable the toggle for Confluence. If you have multiple applications, repeat these steps for each application for which you want to enable the integration.

Test the integration
Test your connection before announcing the Confluence integration to your users.
Open an application that has Search and a Confluence connection enabled.
Launch the Assistant then click the Search icon.
Enter a search query that should have matching results from your Confluence instance.
