What it is
The Userlane Assistant is your users' main navigation tool for your content, providing access to all of your Guides and Messages.
When the Assistant is enabled for your users, an avatar is displayed in your application providing direct access to the Assistant menu:
- Guides
- Messages
- Search
- Help
ℹ️ This navigation is not available if passive mode was activated for your account.
What it looks like

How to set it up
Enable relevant menu options
| Menu Option | Functionality |
|---|---|
 Guides |
|
 Messages |
|
 Search |
|
 Help |
|
You can set this all up under Customize.
Customize the Assistant Look
You can adjust
- the avatar image
- the default colours
- the default texts
- the Help image
You can change the design under Customize > Design.
ℹ️ View our Working with images article to learn more about image file recommendations.
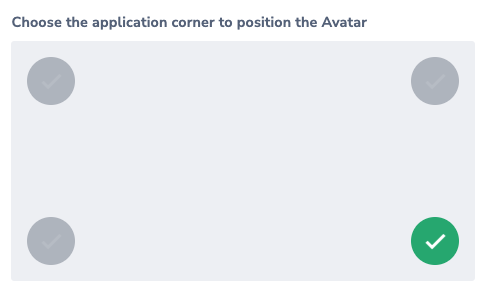
Assistant Position
Fixed Position
You can customize the Avatar to show it in any corner of your application.
Choose the position that fits the underlying application best and doesn't hide anything.
- You can change the position under Customize > Assistant.
Movable Avatar
Sometimes the Assistant avatar gets in the way of important UI elements. Thus, we also offer the option to have a movable avatar.
- You can turn on the movable avatar under Customize > Assistant.
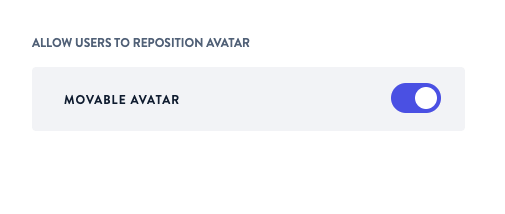
- Users can move it by hovering over the Assistant avatar, click-hold, then dragging and dropping it from any of the six suggested spots.
- The avatar position will remain in the selected position until the user drags it into another one, or until the feature is turned off.
⚠️ Limitations
- If the underlying app has event listeners in place that target drag events, the event listener may block the avatar mobility from working.
- If the Avatar Reposition toggle is turned off under Customize > Assistant, then the assistant will return for all users to the default position specified in the Portal.
- If a user has enabled cookies to be deleted after each session, the assistant will go back to the default position specified in the Portal.
General Settings
The following options are available on your application's Settings page in the Portal to customize the Avatar behaviour.
Switch on the entire product for your end users
Settings > General > Switch Userlane on/off
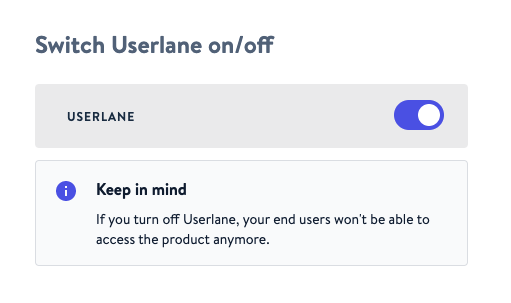
With this setting, you can deactivate Userlane Content for your end users. You will still be able to use the Editor.
Hide Userlane for your end users who signed up prior to this date (and time)
Settings > General > Hide Userlane from users who signed up after a specified time
If you specify a date and time here, only end users who signed up for your service after this date and time will be able to see your Guides. This requires some changes in your code snippet. Read this article to learn about the required changes in the snippet.
Hide Userlane on screens smaller than a specific size
Settings > General > Hide Userlane on screens smaller than a specified size
You can define the minimum width of screens in px. The recommended size for a mobile screen is 769px. On screens smaller than this width Userlane will not be available for your users. When left blank Userlane will be shown on all screen sizes.
Target specific application areas
Settings > General > Target specific application areas
Specify where Userlane Suite content should be available in your application. Your users will see it in the areas indicated in the segment. Check this article to learn more about Page Segments and this article to explore User Segments.
