Single Sign-On is a convenient, yet secure way of authenticating a user - without them having to set up a new password.
Requirements
- access to Google Admin center
- access to Userlane Portal
In order to configure the Single Sign-On for Userlane, follow these steps below:
1. Configuring Google Workspace
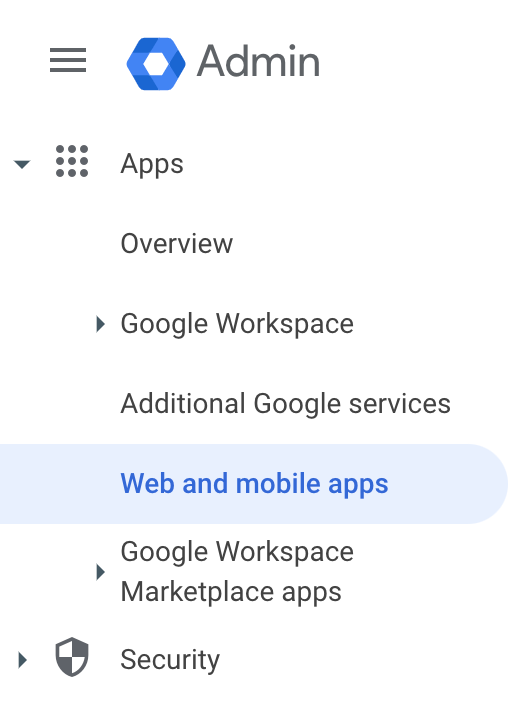
Open the Google Admin center (admin.google.com) and navigate to Apps / Web and mobile apps
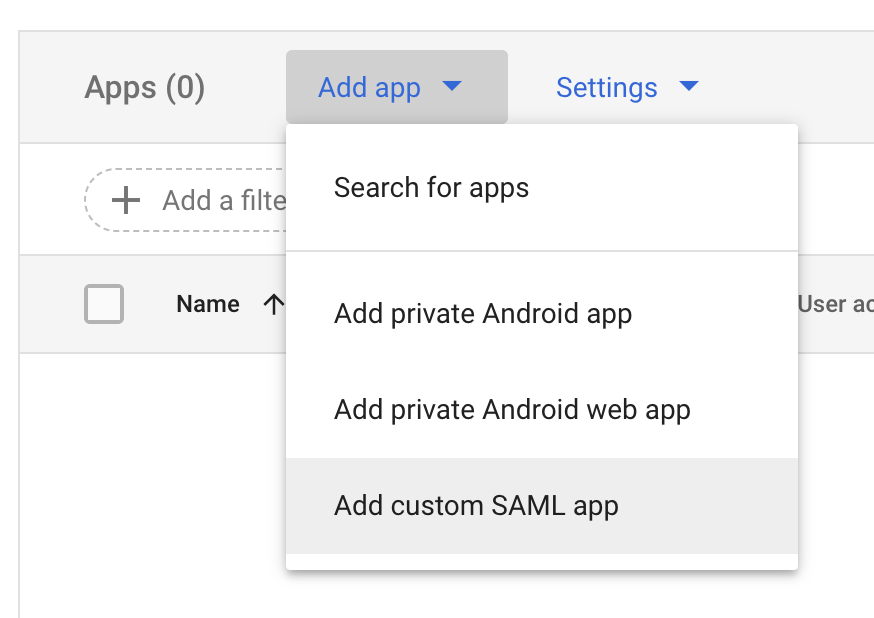
Click on “Add app” and select “Add custom SAML app”
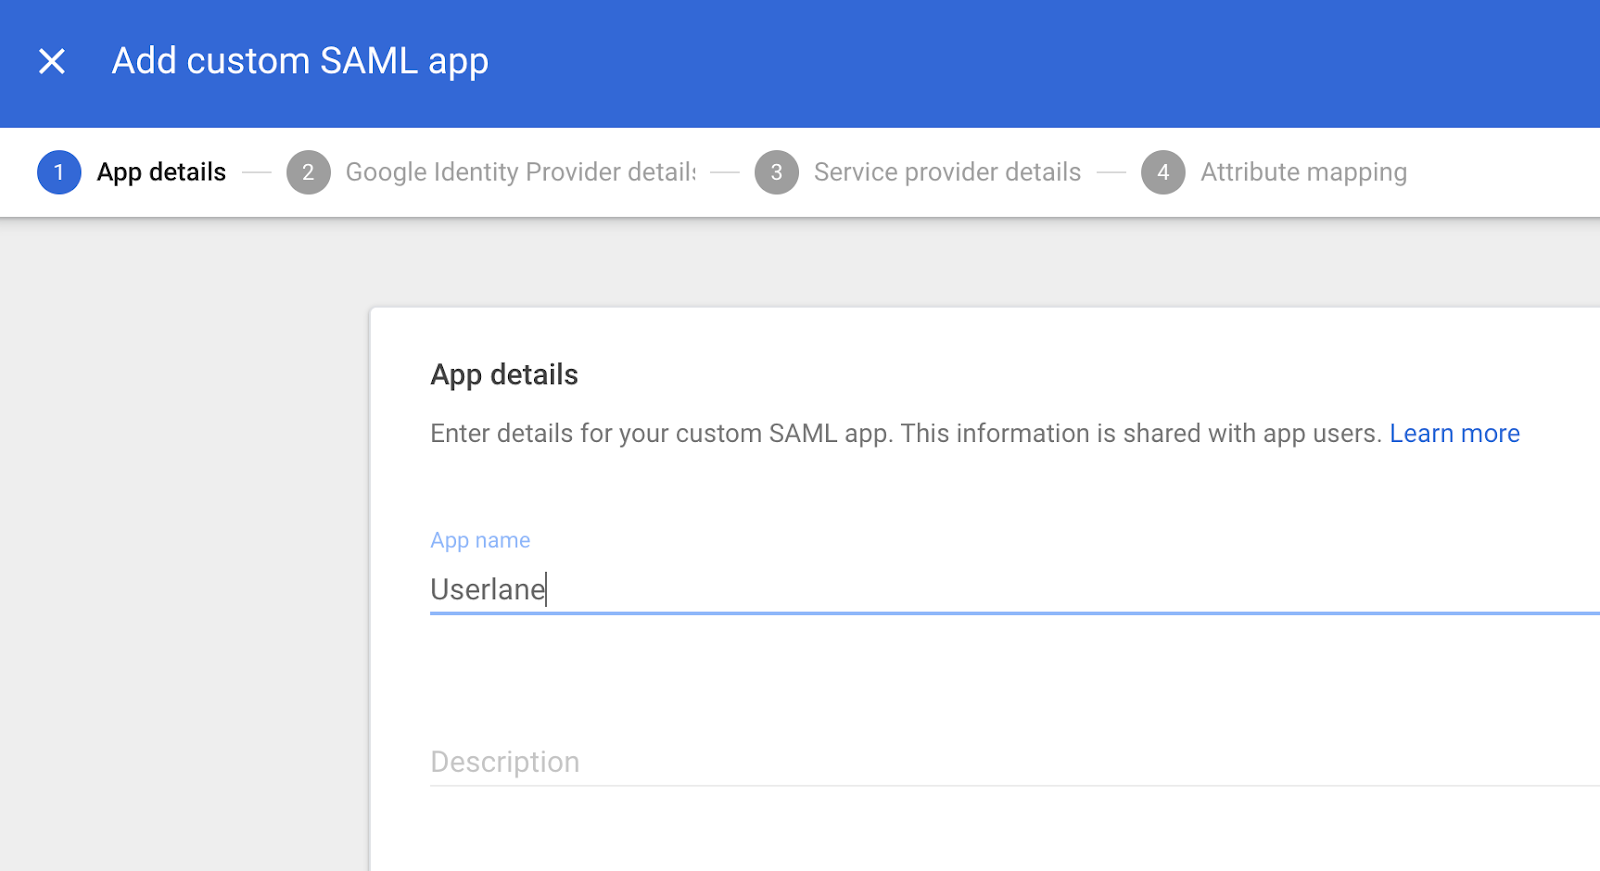
Enter “Userlane” as App name. Optionally add a description and App icon (these are non-essential parameters). Continue to the next screen.
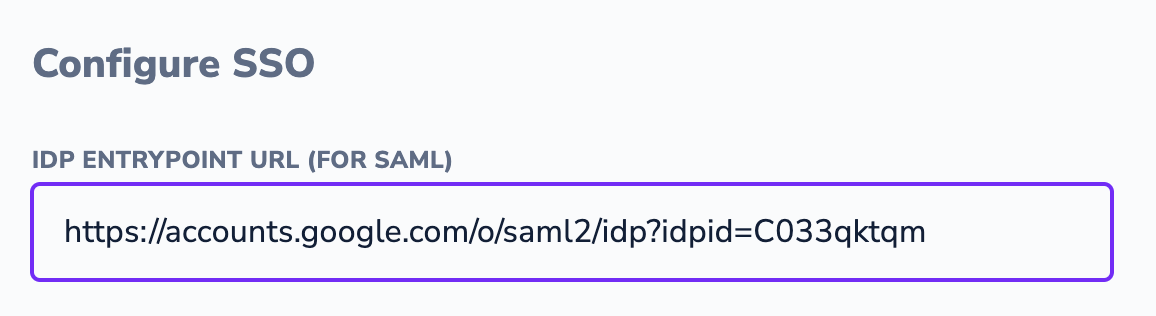
Copy the SSO URL from Google and paste it into the “IDP Entrypoint URL” field in the Userlane Portal’s SSO configuration page (Account > Global settings > Single Sign-on).
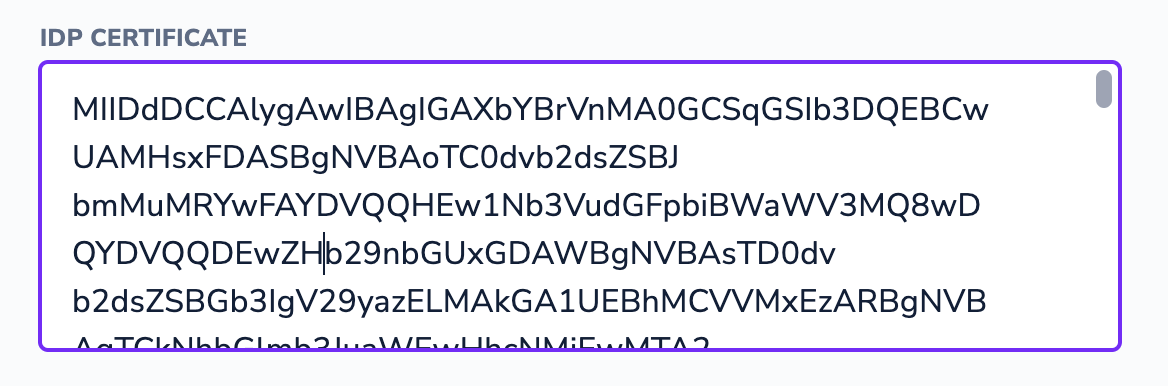
Copy the Certificate from Google and paste it into the “IDP Certificate” field on the same page in the Userlane Portal.
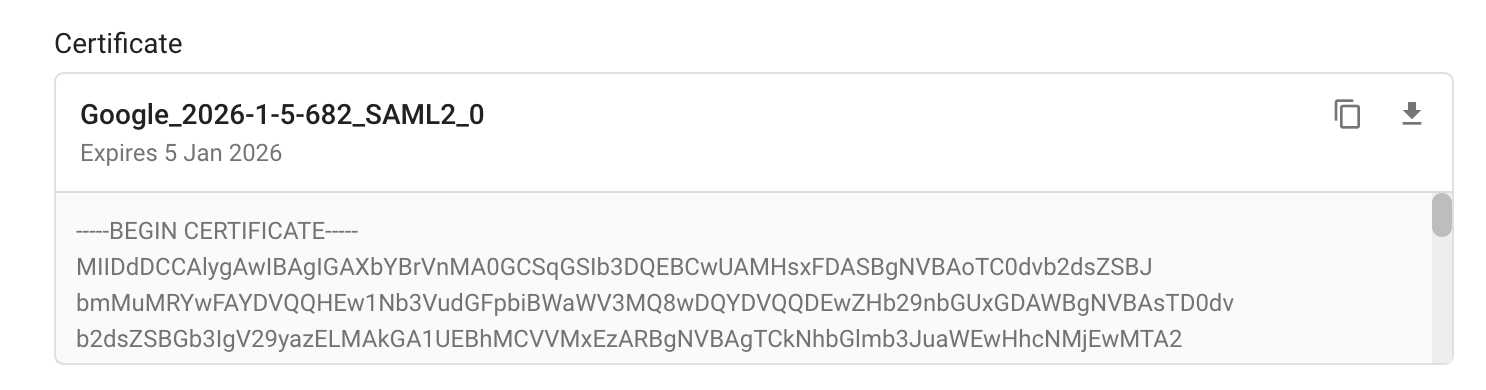
Then remove the “---BEGIN CERTIFICATE---” and “---END CERTIFICATE---” lines from the beginning and ending of the textbox.
Confirm these edits by clicking “Save” on the Userlane Portal.
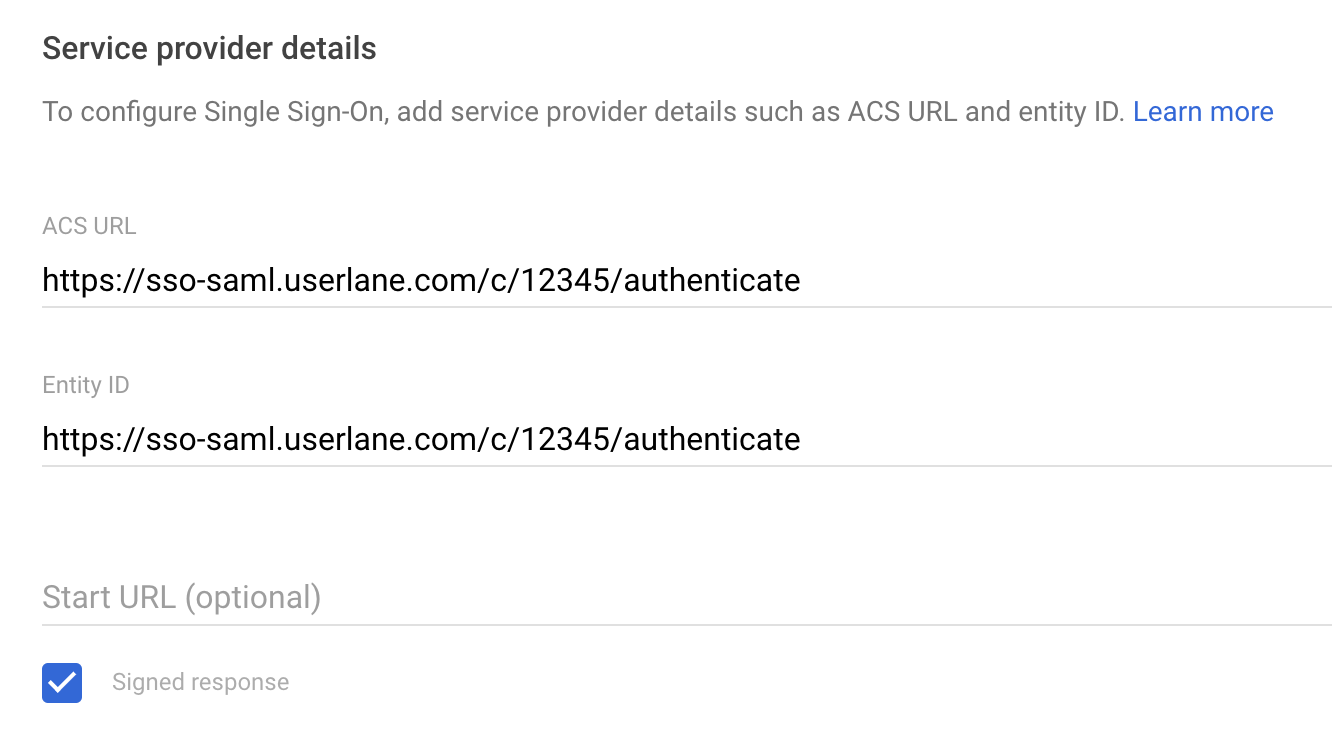
Copy the “Userlane Entity ID & Consumer URL” from the Userlane Portal. This typically looks like a URL starting with https://sso-saml.userlane.com/..

Back on the Google Admin page, continue to the next step.
We tried to make this as easy as possible for you at Userlane, so the copied URL same value goes into both the “ACS URL” and “Entity ID” on the Google Admin configuration screen. Tick the “Signed response” checkmark.
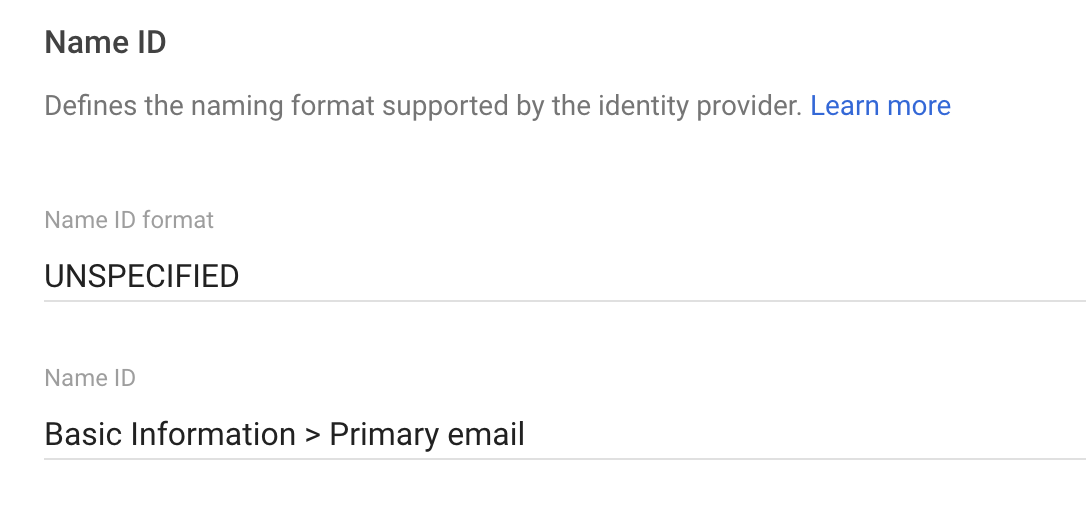
For the Name ID confirmation, you can leave the default configuration unchanged.
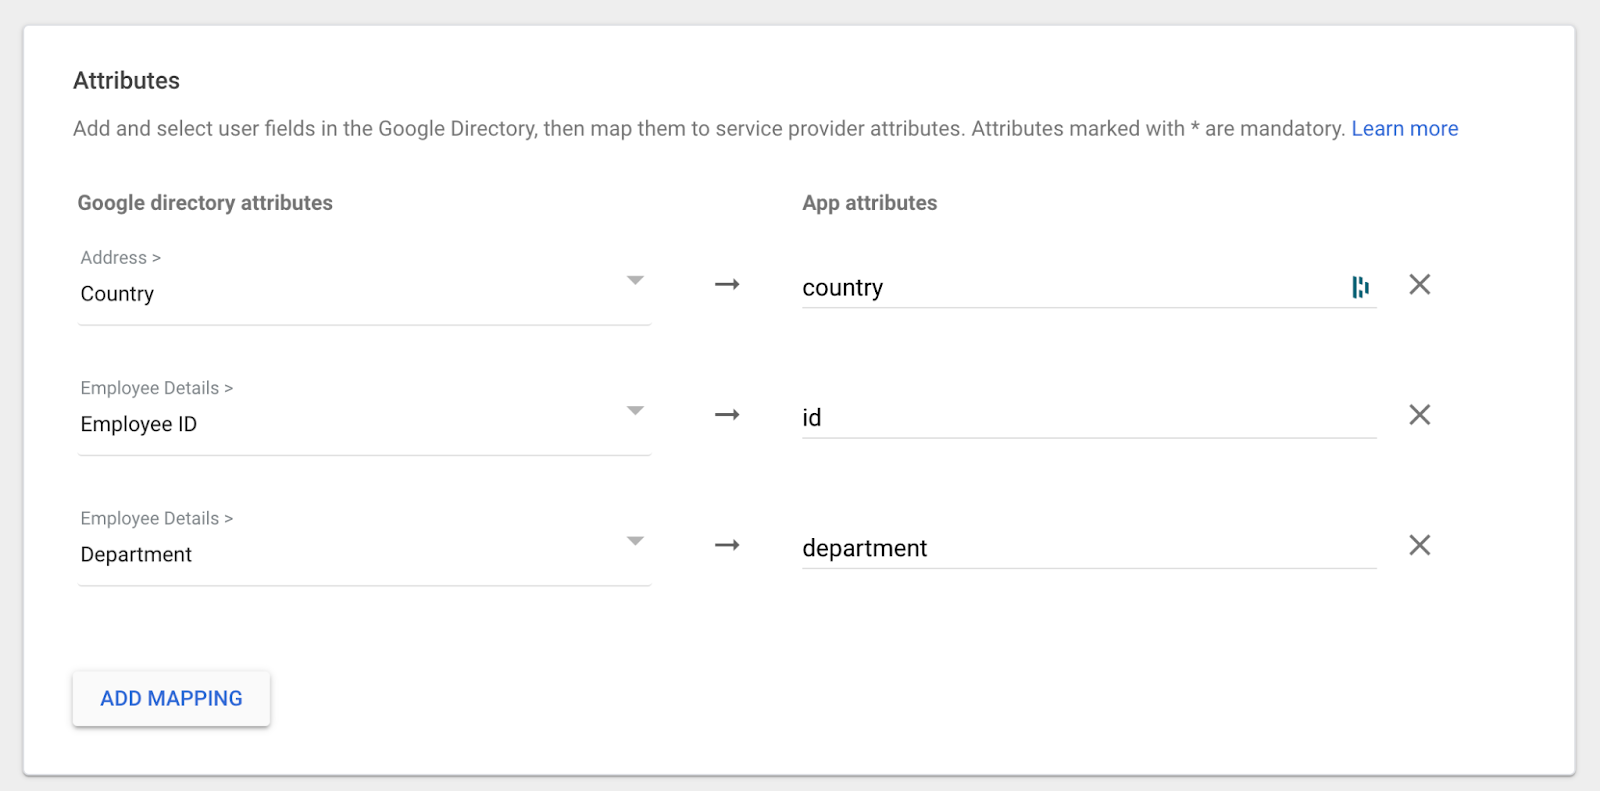
On the next step, you can optionally add attributes that should be handed over from Google Workspaces to Userlane for each user. This allows you to enhance the Userlane profile in Userlane, which can be used to segment users and show them targeted content. You can leave it blank or add a few relevant mappings:
Complete the configuration of Userlane as SAML App in Google Admin.
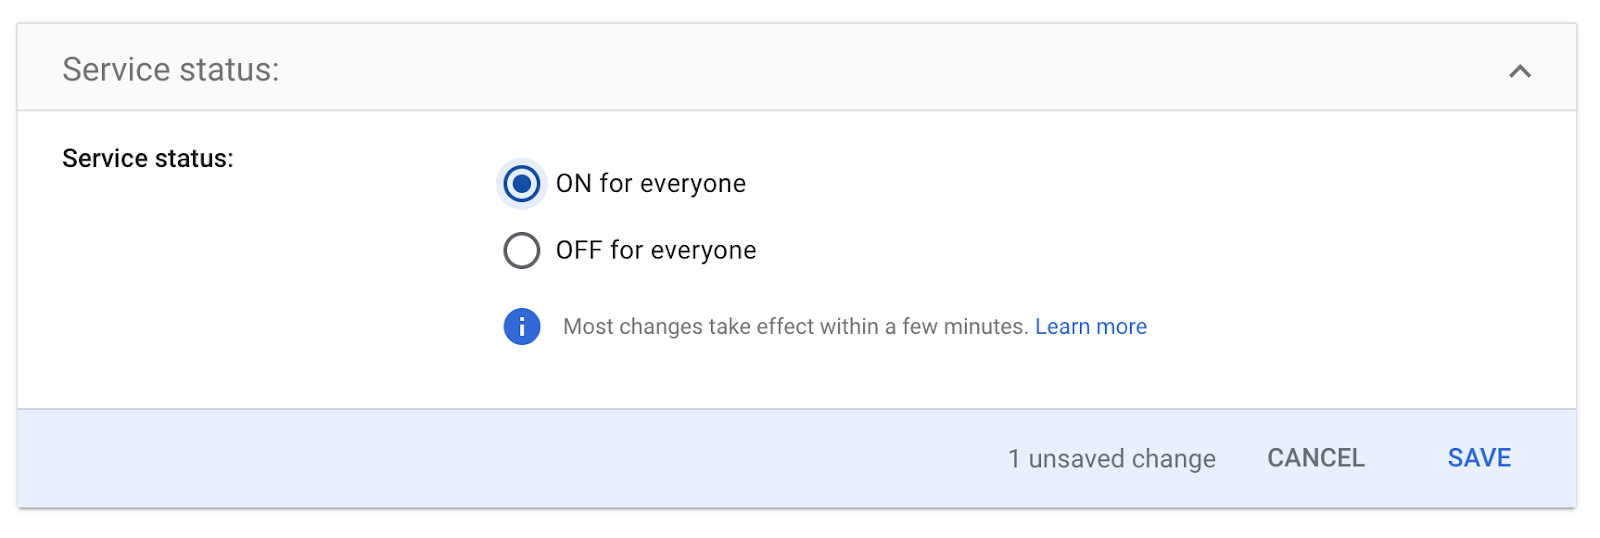
Make sure to enable access to the Userlane SAML App in Google Admin for your entire organization.


2. Add information to Userlane Portal
Continue with step 4 from the article on setting up SSO for Userlane.
